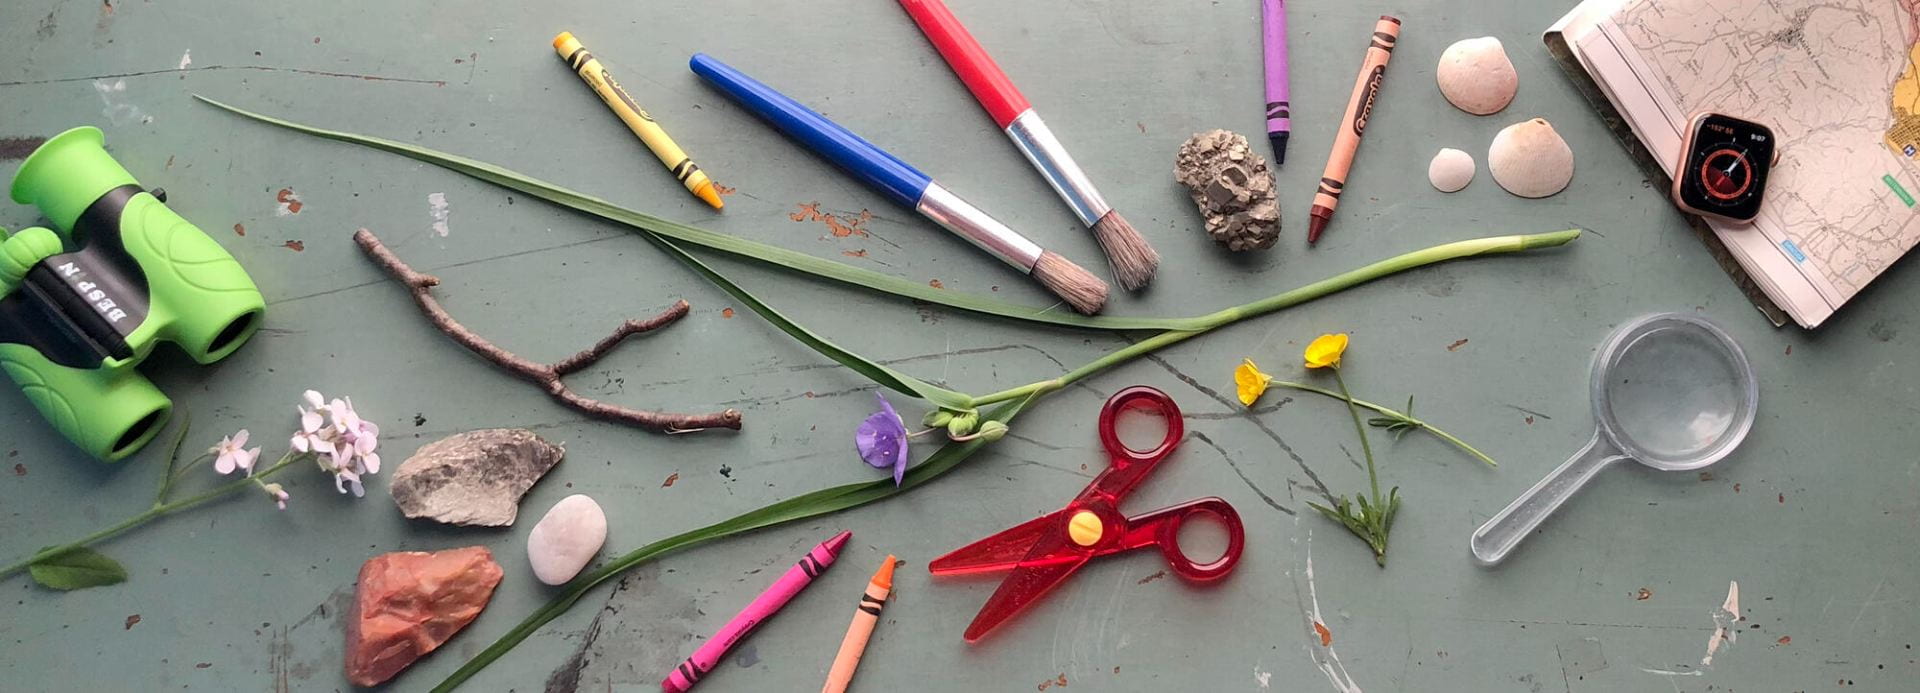
Explore culture and science with games, experiments, and things to make at home.
Create
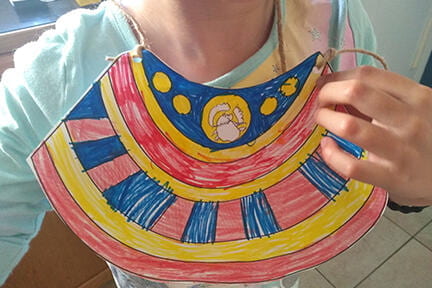
Skull Mask (15 mins or less)
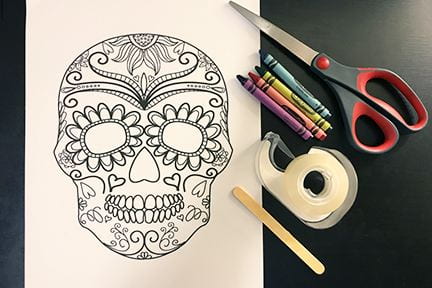
Skulls are a common decoration seen on the Día de Los Muertos/Day of the Dead celebrations held in Mexico and places where Mexicans live. The decorations are called calaveras in Spanish and represent the idea that all living things die. During Day of the Dead, the spirits of family members return to visit the world of the living. Families prepare food and drink for them, place some of the spirits’ favorite items on a tabletop altar and visit cemeteries to sweep and clean the sites. Bakeries sell candy in the shape of skulls made out of white sugar. They are decorated with beads, paint, feathers, and sequins. Some sugar skulls are placed on home altars. Others are flavored with vanilla and adorned with icing (no feathers or sequins) and given to children to eat. You can color and construct a hand-held mask based on a decorated sugar skull.
Build a Stone Monument (15 mins or less)
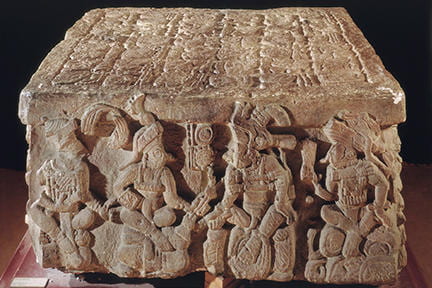
Do some heavy lifting and make your own monument like this stone one. The original, still in Honduras, was made in 776 AD from tuff, a volcanic rock. The plaster copy was made for the Peabody Museum about 125 years ago. You can see that the sculpture is square, with an inscription in Maya glyphs on the top. It tells the story of how the kingdom of Copán was founded. Around the sides there are sixteen different individuals sitting cross-legged, four on each side. Color, cut, and tape your own paper model. Look for the earliest king who is wearing what looks like goggles. His name, Great Sun Green Quetzal Macaw, is spelled out with symbols in his headdress. He is left-handed as he holds his shield on his right arm. Can you see his ear jewelry? They are likely made of green jade. The earliest king is handing a baton or scepter of leadership to the final king, who looks back in time at the first king–a message that the last king was as worthy to rule as the first king.
Ponte a prueba y crea tu propio monumento como este de piedra. El original, que aún hoy sigue en Honduras, se hizo en el 776 DC de piedra volcánica. La copia de yeso fue hecha para el Museo Peabody hace unos 125 años. Puedes ver que la escultura tiene forma de caja, con una inscripción de glifos mayas en la parte superior. Describe la historia de cómo se fundó el reino de Copán. A los lados hay dieciséis personas diferentes sentadas con las piernas cruzadas, cuatro a cada lado. Colorea, corta y aplica pegamento en barra a tu modelo de papel. Busca el primer rey que lleva lo que parecen gafas. Su nombre, Señor Gran Sol Quetzal Macaw, se deletrea con símbolos sobre su tocado. Él es zurdo y sostiene su escudo con su brazo derecho. ¿Puedes ver las joyas de sus orejas? Es probable que estén hechas de jade verde. El primer rey está entregando un bastón o cetro de liderazgo al rey último, que mira a la vez al primer rey–mensaje de que el último rey era tan digno de gobernar como el primero.
Reading with Raven (30 mins or less)
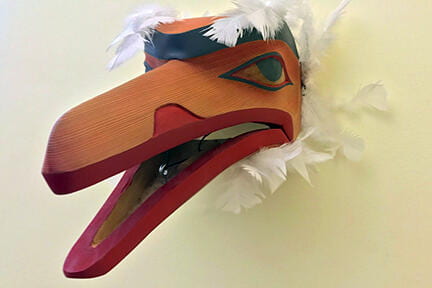
Where does the sun come from? How did it get up there? In one of our Peabody Museum programs for schools, we draw upon the story of Raven, a mischievous and wise supernatural creature, to explain one view from the peoples of the Pacific Northwest. Raven appears in many tales. Look closely at the mask. The feathers are unlike the bird we know today. One of the raven stories describes how the bird became black.
Listen to master storyteller Gene Tagaban (Tlingit & Cherokee) share a version of How Raven Stole the Sun. Then create your own version of a traditional tale with our Story Maker page (PDF).
- Look outside for inspiration or find pictures of an animal on the Internet.
- Draw the animal with lots of details to get a feel for its habits and personality. Use it as illustration.
- Imagine a creative explanation for why the sky is the way it is. Why are clouds white? Where does fog go?
- How could the animal you drew be involved in this story?
- Write it down using the storymaker page!
Scarab Beetle Necklace (15 mins or less)
Khepri is a beetle-faced god in ancient Egyptian religion who represents the rising sun of the morning. He was associated with the dung beetle because they both do similar things: roll balls around. The god rolls the sun through the underworld at night, pushing it over the horizon to make morning and the beetle rolls a ball collected from animal poop to an underground lair where it can safely eat it or use it as a nest in which to lay its young. The ancients believed that one kind of dung beetle, Scarabaeus sacer, was only male and reproduced without a female. The solo creation of the beetle was like Khepri, who creates himself out of nothing, so the ancient god also represents life and resurrection.
Download and decorate this necklace (PDF) worn by both male and female Egyptians during the time of the Pharaohs. If you want to draw a scarab beetle as a central jewel, check out this 8-minute how-to video.
The Umbrella/La Sombrilla (15 mins or less)
Join HMSC Story Time Program Assistant Maria Celeste Luna for a virtual story time in Spanish and English! This week’s story is The Umbrella/ La Sombrilla by Jan Brett (G. P. Putnam’s Sons, 2004).
Women in Science Booklet (30 mins or less)
Make your own mini booklet of women in science (PDF)!
Need help? Watch the tutorial.
Play
Hug A Tree (5 mins or less)
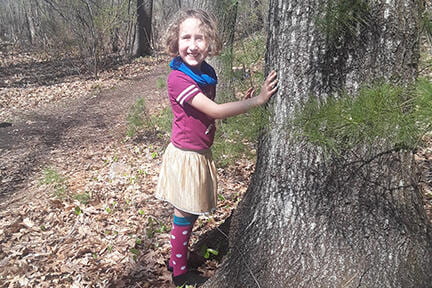
Just like people, each tree is unique. Play this game with a partner to find out what makes a tree special. This game is best played in a spot with at least three trees and flat ground. Try it on a hike!
For this game, you’ll need a partner and a blindfold.
- First, ask your partner to cover their eyes with the blindfold.
- Once they’re blindfolded, spin your partner around a few times, so they don’t know which way they are facing. Wait until your partner isn’t dizzy anymore.
- Lead your partner carefully to a tree.
- Have your partner hug the tree! Tell them to feel the tree all over. What do they notice that is special about the tree?
- Lead your partner carefully away from the tree.
- Spin them around again so they don’t know which way they came from.
- Ask your partner to take off the blindfold.
- Now, challenge your partner to find their tree!
- Switch places with your partner! Now it’s your turn to hug a tree!
Further Exploration
What helped you figure out which tree was yours? Did it have branches or roots in special places? Was it a certain size in your arms? Did its bark feel rough or smooth? Now use your eyes to investigate further. Look at the color of the bark and the size and shape of the leaves. What else makes your tree special? If you want to know what kind of tree you are looking at, try using the Leafsnap app to identify it.
La Thunkuna (15 mins or less)
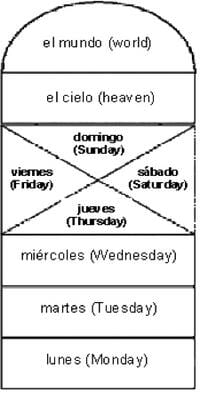
Hopping games exist around the world and we play them during programs at the Peabody Museum. They are all a little different. They are called kith kith in India, Lay-lay in Iran, and Potsyin Brooklyn, New York. Courts or patterns can be drawn in dust with a stick, in colored chalk on a street, or on a hard, sandy beach with a shell. Games use a puck you can make and decorate yourself or just find a cool rock. Try this classic hopping and kicking game called La Thunkunafrom the country of Bolivia in South America. Today children play the game with the same court but they number the squares instead of naming them.
How to Play
- Draw the pattern big enough so that you can put your feet into the squares.
- Throw the puck/rock into the first box, Lunes (Monday) and hop over this box into the second box, Martes (Tuesday). Always hop over the space where the puck lands.
- Kick the puck out the first box, Lunes, and back behind the starting point. After you kick the puck out you hop back out of the pattern.
- Repeat the same pattern until Jueves (Thursday), where you use both feet; one in each striped square. Then jump on one foot into box Domingo (Sunday), and kick the puck back behind the main baseline.
- Don’t throw the puck in the striped boxes. Do throw it into Domingo (Sunday).
- The winner is the one who gets to El Mundo (World) level first.
From Mary D. Lankford, Hopscotch Around the World. Morrow Junior Books, New York 1992 p.10.
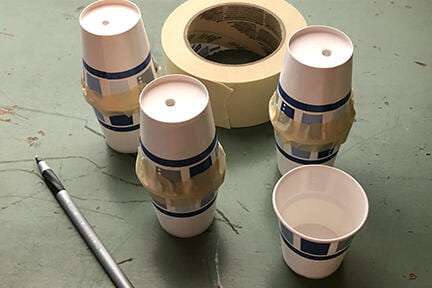
Smell Like a Wolf! (15 mins or less)
Wolves communicate in many ways, including through smell. Wolves use their scent to show their identity or mark territory. They can also use their scent to share information about food with their pack. Wolves will even bury food in a cache and will scent mark when the food has all been eaten to let other wolves know the cache is empty! Wolves have a very good sense of smell. How good is your sense of smell? Try this game to find out!
Materials
- Small paper cups, like Dixie cups
- A variety of scented liquids or materials such as cooking extracts (for example: vanilla, peppermint, lemon, or anise), vinegar, or liquid hand soap, cinnamon, banana, or soil
- Cotton balls
- Tape
- Ballpoint pen
Directions
- Make a pair of scent boxes:
- Put a small amount of one of your scented materials into a cup (if the liquid is very runny, put a cotton ball in the cup first).
- Put a second cup upside down to cover the first cup (the rims of the cups should be touching)
- Tape the cups together around the rims
- Use the pen to poke a hole in the end of one cup
- Repeat to make a second box with the same scent
- Continue making pairs of scent boxes for each of your scented materials
- Mix up your boxes
- Sniff through the hole in the box to smell what is inside
- Can you match the boxes by smell?
- Challenge a family member! Can they match the boxes by smell?
Further Exploration
Can you guess what something is by the way it smells? Close your eyes and have a family member hold something under your nose. What do you think it is? Now, open your eyes. Were you right? Switch places! Have your family member close their eyes and guess what you hold under their nose. Remember, check with a grownup about what is safe to smell.
Celebrate Nowruz (5 mins or less)
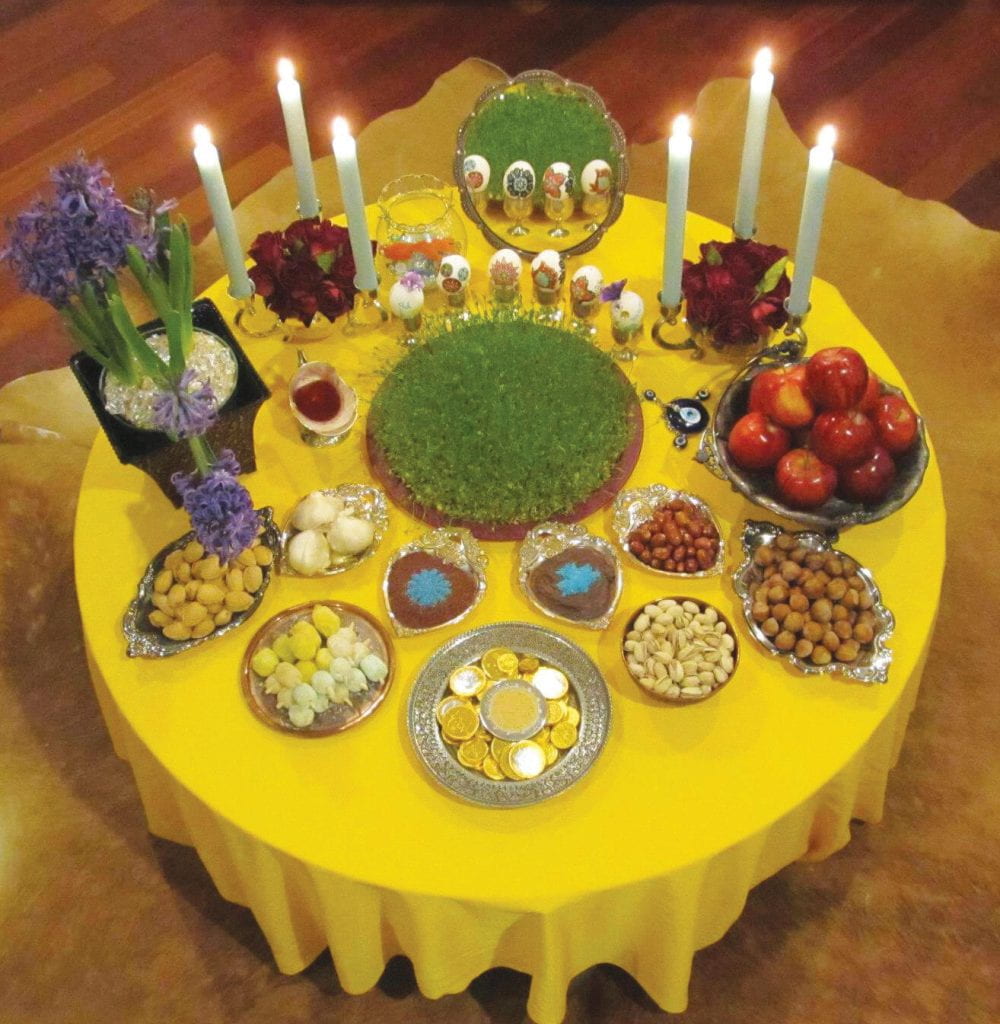
The festival of Nowruz (pronounced no-rooz) is an ancient celebration of the New Year and spring. It is a joyous two weeks for millions of people of different cultures around the world. Families in Iran, Afghanistan, Pakistan, Western China and America have their own ways of celebrating, but there are many common practices.
Families eat special foods like candied nuts, sweet pudding, and fresh greens. People go on picnics, clean houses, and buy new clothes. They put up decorations like the beautiful table that holds objects that remind us of the sweetness of spring and new life. Can you see flowers like the purple hyacinth, sweet apples, dyed eggs, sprouting seeds like the green wheat grass? Often there is a live goldfish.
People may also jump over small fires outside with a saying to bring good luck and health. A popular saying to the fire is, “Zardie man az to, sorkhie to az man,” or in English, “May my pale sickness be yours and your red glow be mine”. It means trading in the color yellow, which is a sign of sickness, to red, a sign of health. Recreate your own jump into spring this week.
Try this
- Pile up some pillows in a stack to the height of your knees.
- Step back two steps.
- Say your phrase loudly and jump over the pillow fire.
- If you do it a few times, you will get a glow in your cheeks!
Further Exploration
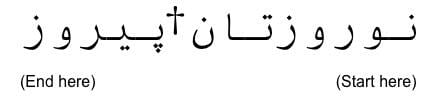
You can also try writing Happy New Year “Nowruz-e ton Piruz” in Farsi–remember to write right to left! Don’t forget the dots!
Experiment
Experiment with Shells!
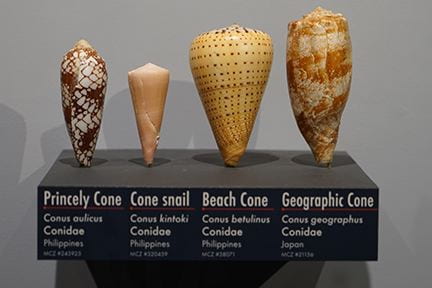
It’s fun to collect shells at the beach. You might find shells of many shapes and sizes, from small, curled marine snail shells to large, flat clam shells, washed by the waves onto the shore. We usually find these shells empty, after the animal that once lived inside has died. You may wonder where these shells come from. Seashells are actually the skeletons of marine mollusks like snails, clams, scallops, and mussels. Unlike humans, mollusks do not have a skeleton inside of them. Instead, many form exoskeletons, hard coverings that surround their bodies. Just like our bones form and get bigger as we grow, the shells of mollusks are made by the animal’s body. The clam, scallop, mussel, and snail shells we find on the beach are made of calcium carbonate, a compound that is sensitive to acid. Try this experiment to see how shells react to acid.
Materials
- Seashell
- Vinegar
- Clear drinking glass or jar
Directions
- Place the seashell in the glass or jar
- Pour in enough vinegar to cover the shell by about 2 inches
- Look closely at the shell. Can you see tiny bubbles rising off of the shell and through the vinegar? The vinegar is reacting with the shell and releasing bubbles of carbon dioxide.
- Change the vinegar every day and watch what happens to the shell over time!
Thinking Deeper
While the ocean is much less acidic than vinegar, the acidity of the ocean is increasing. Carbon dioxide from the air dissolves into the ocean, making it more acidic. The more carbon dioxide in the air, from car emissions, changing land uses, and other human activities, the more dissolves into the ocean and the more acidic the ocean becomes. What do you think will happen to the shells of mollusks if the ocean becomes more acidic? What do you think we should do about it? To learn more about how climate change is affecting the oceans and what we can do about it, check out these resources from New England Aquarium.
Cookie Excavation (30 mins or less)
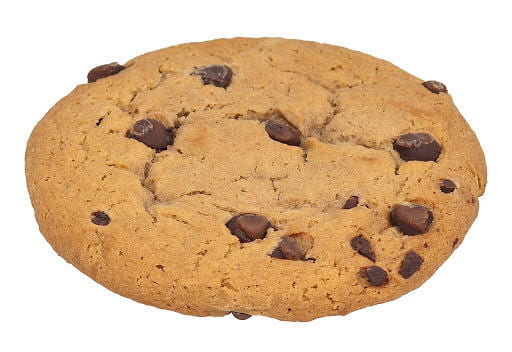
Excavation is the method that archaeologists use to extract artifacts out of the ground. The work is very detail oriented because the archaeologists are destroying the site that they are trying to study. They can’t put it back together and there are no “do-overs.” It is also impossible for the archaeologists to know exactly what is under the ground while digging, so they have to note everything with photos, sketches, maps, and descriptions to be sure to get the whole picture. Do you have the patience to be a good field worker?
Material for each excavator
- 1 chocolate chip cookie (oatmeal raisin works too!)
- 1 toothpick
- 1 small plate
Gather the materials above.
You are archaeologists and you have to excavate artifacts (the chocolate chips) from your archaeological site (the cookie) using your trowel (toothpick). Do not break the chips–keep them whole!
Before you start, make a record of where the chips you can first see are located using this handy grid sheet (PDF) from the Southeastern Archaeology Conference and the Florida Public Archaeology Network.
After ten minutes of carefully removing the cookie away from the chips with your pick, stop, and find out how many WHOLE chips you were successful in excavating.
Follow the directions on the note sheet to record your finds and see which area had the most chips.
Ok, you can eat the cookie now!
Mirror Maze (30 mins or less)
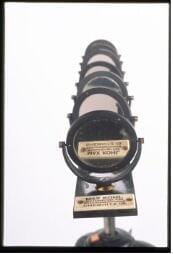
Play isn’t just for kids! Scientists play, or “mess around,” to figure out how to use new tools, discover how the natural world works, and investigate new phenomena. Playing with light and mirrors helps scientists understand optics, the behavior and properties of light. Try this activity to play with light and see what you can discover!
Can you use mirrors to bounce a beam of light from a flashlight or a laser pointer so it hits a target?
Directions
- Gather some small mirrors. For this activity, you will need 2–5 small mirrors. Try using hand mirrors, mirrors in cosmetics cases, toys, or mirrors in baby books.
- Find things to prop up your mirrors. If you are using mirrors in baby books, open the book to the page with the mirror and stand the book on the ground. If you are using hand mirrors or toy mirrors, you may need something to hold the mirror up. Try using a hardcover book. Open the book and stand it on the ground. Lean the mirror into the V made by the open book. For other mirrors, experiment with items around your house to see what works best.
- Pick a light. Use a flashlight with a small, bright beam, or use a laser pointer. If you are using a laser pointer, make sure to keep the beam away from your eyes.
- Choose a target. Try this activity in a darkened room. Find a place on the floor near a wall where you can work. Choose a spot on the wall that will be the target for your light beam to hit.
- Try a single bounce! Set up one of your mirrors on the floor. Shine your light at the mirror. Where does the light go? Can you move your mirror and angle your light so the beam hits your target?
- Add more bounces! Try adding a second mirror. Can you make your light bounce off both mirrors and hit your target? Do you need to move your mirrors or angle your light differently to make it work? Try adding more mirrors. How many bounces can you do?
Tip: A laser pointer works best for three or more bounces
Make a Compass (15 mins or less)

Compasses are useful tools for navigation. They are some of the oldest navigation tools in history. They have helped explorers and travelers find which direction is north. Compasses work because Earth has a magnetic field which makes the planet act like a giant magnet with two magnetic poles, north and south. A compass holds a magnetized needle that can spin. The needle also has a north and a south pole. With magnets, opposites attract, so the south magnetic pole of the needle is attracted to the north magnetic pole of Earth. This makes the needle spin until it points to magnetic north. The magnetic north pole is close to, but is not exactly the same as the geographic North Pole.
With an adult’s help, make a simple compass and see Earth’s magnetic field in action!
Materials
- Large metal sewing needle
- Two-sided magnet
- Disk sliced from a cork
- Thumbtack
- Bowl of water
Directions
- Magnetize the needle. With one side of your magnet, stroke the needle from the eye to the point. Do this fifty times, always with the same side of the magnet and always stroking from the eye to the point. Now use the other side of your magnet to stroke the needle in the other direction, from the point to the eye. Do this fifty times as well. Your needle has now become a temporary magnet with a north and a south pole.
- Stick the needle through the cork. Use the thumbtack to make a small hole in the side of the cork disk. Push the needle into the hole and through the disk until there is an equal length of needle sticking out of each side of the cork.
- Float the needle in the bowl of water. Place the cork gently onto the water, so the needle lies on the surface. Floating the needle in the water allows it to spin easily.
- Watch the needle. After spinning around a little, the needle should settle into a direction. Take the needle out of the water and put it in again. Does it point the same way? Your needle should be lined up so that one end is pointing north and the other is pointing south!
Tip: If you are not sure which end of your needle is pointing north, many smartphones have a compass app you can compare with your compass needle.
Backyard Geology: Sand (5 mins or less)
Backyard Geology: Mountains (5 mins or less)
Observe
Keep a Nature Journal (30+ mins)

Keeping a Nature Journal is a great way to closely examine the world around you and connect with nature. There are many ways to keep a Nature Journal. Some people write or draw in their journal every day. Some people make notes only when they notice something that is particularly interesting to them. Some people always write or draw about the same place. Others add to their journal wherever they are. Check out these tips about starting a Nature Journal to help you get inspired (PDF)!
Get to Know Sharks (15 mins or less)
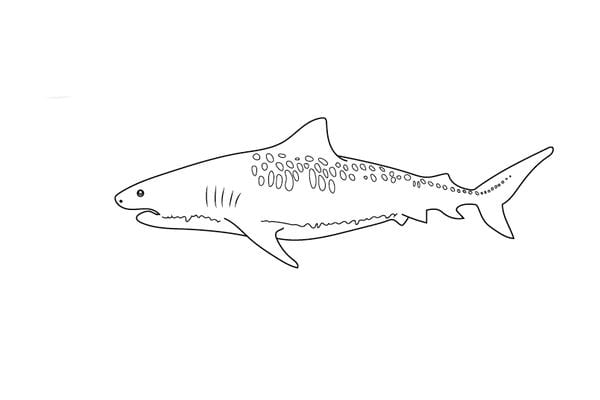
What is your favorite shark: a tiger shark or a white shark? Celeste Luna has created a special shark-inspired coloring page and matching activity (PDF) so you can explore fun facts about sharks further, such as where they live, what they eat, and what kind of teeth they have!
Make Your Own Mesopotamian Beard (15 mins or less)
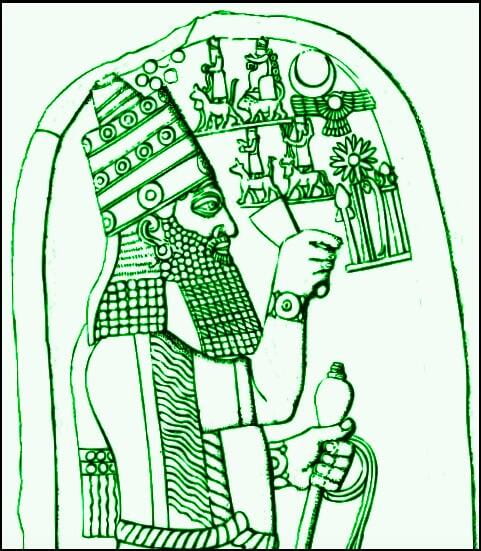
Some cultures have tales of a man-in-the-moon. Mesopotamian religions told of a god called Nanna that was the moon. Mesopotamia is a historical region from 5,500 years ago that is known today as Iraq, Kuwait and other parts of Western Asia. The Mesopotamian god of the moon was shown as an old man with a flowing beard bejeweled in bright blue stones. His symbol was a crescent moon that he sailed across the night sky like a boat.
QUESTION: Can you find Nanna’s symbol on the statue of King Esarhaddon from our museum? Sometimes the god was shown as a bull because the crescent moon looks like bull horns.
ANSWER: The moon god is shown to the right of the head of Esarhaddon, with the symbols of other gods the king is honoring.
Make Your Own Mesopotamian Beard
Create your own beard like the king or the moon god–be sure to add precious stones for beard jewelry.
Materials
- Construction paper (8 x 11)
- Sequins or stickers
- Scissors
- Yarn or wrapping ribbon
- Glue stick or glue
- Crayons, colored pencils, markers
Directions
- Cut two pieces of construction paper in half along the wide edge so you have 4 pieces.
- Cut strips along the wide edge of two pieces like a fringe leaving a few inches uncut at the top.
- Glue or tape both layers of fringe to one of the uncut pieces–your beard base–so you have two layers of fringe, one a little longer than the other.
- Tape one yarn/ribbon piece to each side of the beard for ties. Snipping holes and stringing ribbon through works well too.
- Draw and color 5 blue gems on your fringe. Add stickers or sequins. Get fancy!
- Curl some of your fringe up by wrapping each strand around a pencil.
- Tie it on to wear it.
Can You Canoe? (5 mins or less)

Have you ever floated in a canoe? It may have been made of fiberglass or aluminum. This birchbark canoe was purchased from a Penobscot man, Francis Sebattis, in 1912 in Old Town, Maine and given to the museum. A birchbark canoe is actually made with the parts of several different trees. Can you point to the skin of the boat? It is made of bark peeled in long sheets from several paper birch trees which are mostly white. The inside of the bark which is light brown, touches the water and the whiter outside part is the inside of the boat.
Can you find four examples of trees that are not birch used on this boat? Look closely for changes in color and texture.
- Did you find the seat? It is woven with cedar tree bark. The ribs of the boat are made with cedar wood.
- Did you notice the zig zag stitch at the front? The birch bark is tied to the frame of the boat with long red-spruce tree roots.
- All those wood bars holding each side apart, called thwarts, are made of maple.
- The black lines are made with pine-tree sap which is boiled into a glue and painted on to seal stitching holes joining pieces of bark together.
Look for fallen birch-bark branches on the ground near trees. Please don’t peel bark off a living tree or it may die. Here are some clues to help you identify a birch tree.